
Photos courtesy of Perma-Chink Systems Inc.
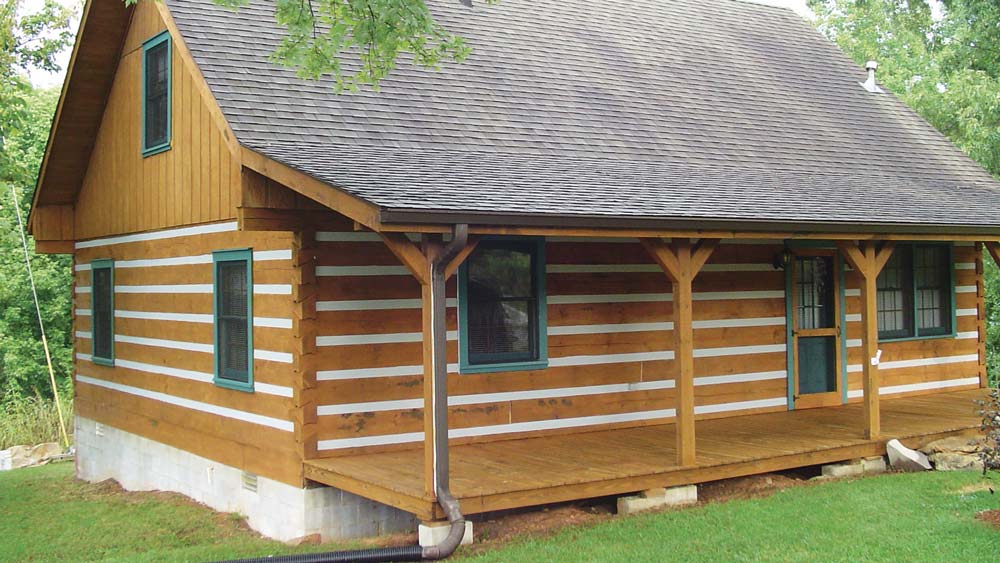
Chinking (those white bands of material you often see between log courses) is both an art and, depending on your log profile, a crucial part of weatherproofing your home. Applying it properly takes a quite a bit of know-how, so we consulted the experts at Perma-Chink Systems Inc. in Knoxville, Tennessee, an innovator in this field, to give us their insights to achieving a professional seal.
1. Get it Clean
First, the wood needs to be clean and dry. Pollen, dirt, sawdust and other impurities must be removed prior to applying the chinking material.
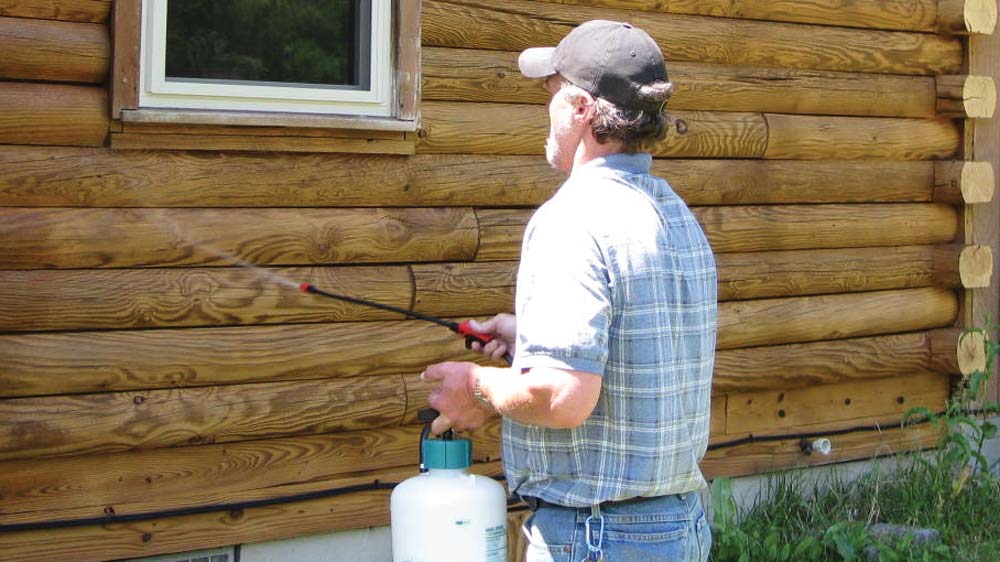
To clean the exterior, combine two cups of solution specifically formulated to cleanse logs with one gallon of clean water. Do not use bleach-it will harm the wood.
Rick Webb, vice president of sales at Perma-Chink, recommends applying their product, Log Wash, to the exterior walls starting from the lowest course of logs upward, applying it in the same pattern to allow even dwell time. Once at the top, rinse from the top down focusing extra on rinsing cracks and crevasses. Allow each wall to dry completely, typically 24 to 48 hours depending on the weather.
2. Install a Backer Rod
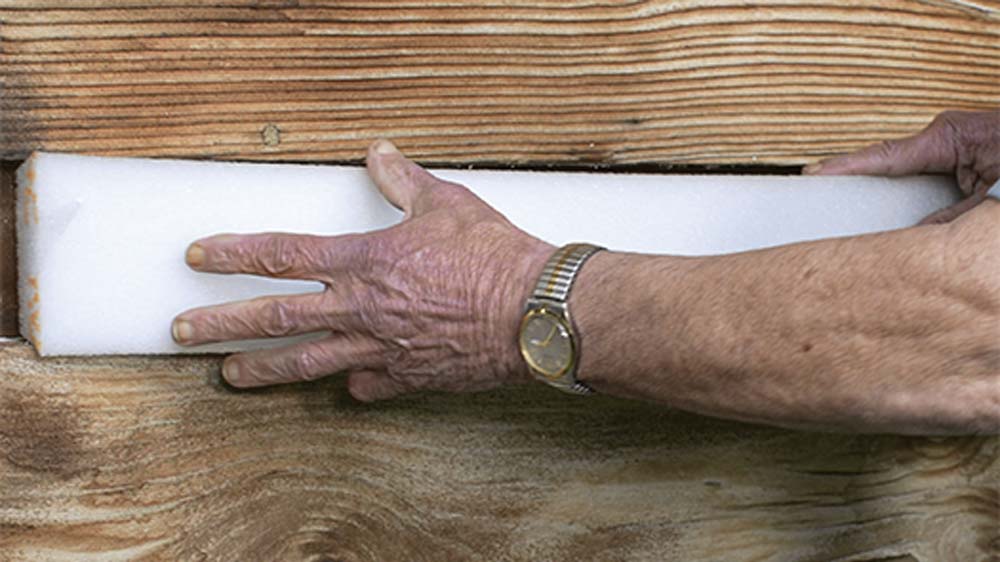
Chinking is designed for two-point adhesion. It should stick to the top and bottom logs, but not the back of the joint. "Insert a round foam backer rod or a closed-cell polyethylene insert (such as Perma-Chink's Grip Strip) that is shaped to fit between log courses, or even high-adhesion masking tape for smaller gaps," says Rick. This creates a bridge that allows the chinking to stretch and contract like a rubber band as the logs settle and season. Without it, the chinking will fail over time due to three-point adhesion causing too much stress on the sealant.
3. Apply the Chinking
You'll need a bulk loading gun and follow plate or a standard caulking gun depending on whether you bought pails or tubes of chinking. Rick suggests battery-powered caulking guns, as they can be real labor savers.
Before applying the chinking material, ensure the log wall surface temperature is between 40 and 90 degrees Fahrenheit. If it's too hot, the chinking will "skin over" too fast; if it's too cold, it will slow the curing process significantly.
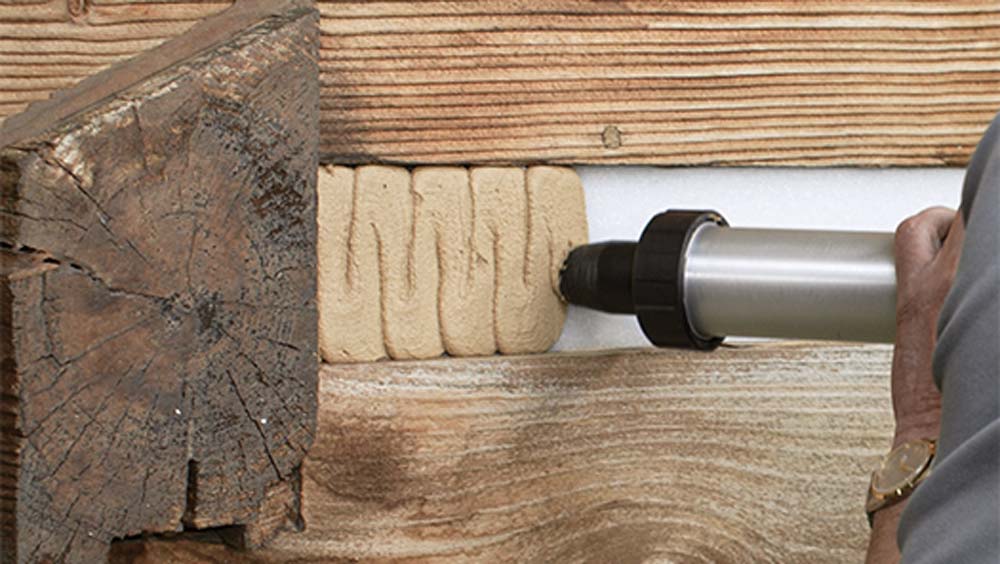
When the conditions are right, apply a steady bead of chinking over the backer rod, in an up and down motion, keeping the beads close together. "You want to avoid air bubbles in the chinking. And ideally, aim for a thickness of about 3/8 of an inch, with a minimum of 5/16," Rick advises. If it's too thin, it will eventually fail; if it's too thick, it inhibits the chinking's ability to perform as intended.
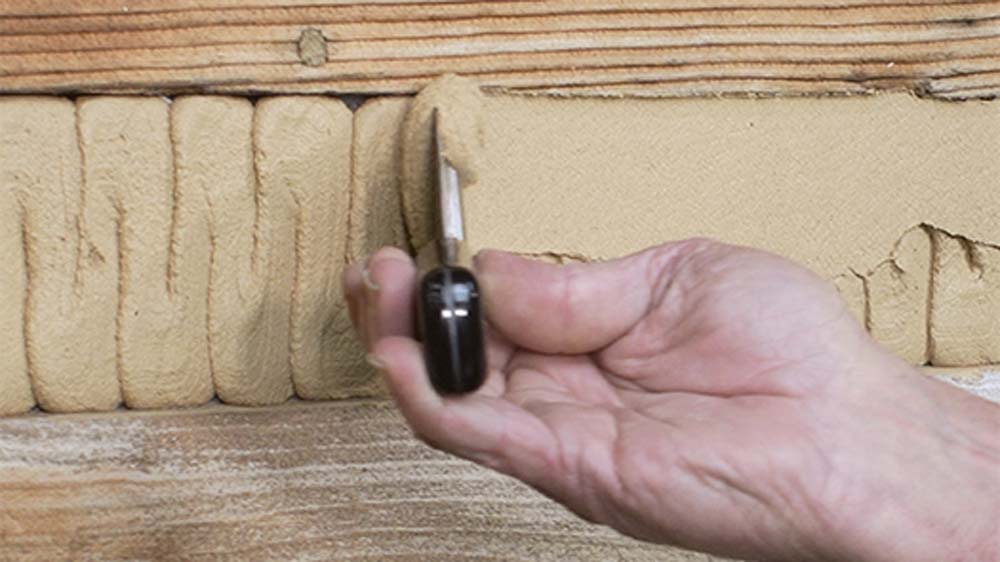
4. Smooth Things Out
Only apply as much as you can tool (smooth out) in about 10 to 15 minutes to prevent the product from skinning over before you're done. Rick says not to pause along a course of logs to grab lunch or some other longer scale project, but to use the home's doors, windows and corners as pause points. And never apply chinking in direct sunlight. Follow the shade around the house, which keeps the logs cool and gives you more "wet time" to get that perfect finish.
Dry tooling should be completed first, pushing the product firmly against the top and bottom log edges to ensure a tight bond. Once dry tooling is complete, a light mist spray of water on your trowel or on the chinking will help you smooth the material, but don't soak it. Keep a damp rag handy to wipe your tools frequently. A clean tool makes a smooth joint.
If you get chinking on the face of the log, wipe it off with warm water immediately. Once it dries, it's difficult to remove. The chinking will be "tack-free" in a few hours, but it takes three to six weeks to fully cure, depending on the weather.
Applying chinking is one of those DIY projects that requires time, patience and a steady hand, and it may be one you want to leave to the pros. But if you're so inclined, these basic steps will get you on your way. For more information, you can watch Perma-Chink's tutorial here.
Charles has had the pleasure of writing about log and timber homes for more than 35 years.